The Leap Year Crochet Blanket

Over on Facebook, a couple of friends of mine started an event whereby we do a square, knitted or crochet a day for 366 days, and then make a blanket at the end, or as we go… Of course as a relatively new crocheter (it was my NYE resolution back at start of 2011 to learn when I was pregnant with my fourth!), I am loving the challenge of crocheting new squares and improving my skills! I have a fairly reasonable stash at the moment, but a lot of the yarn is already accounted for in other projects, so will need some more very soon!! 😉

I hope to start blogging more and updating more this year, and hopefully this time next year I will have a finished blanket!!

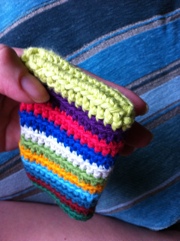
Here is my first square of the year!

Along with this, I have decided that 2012 will be a year that I try and resume jewellery making again since the birth of my fourth baby back in May 11, I haven’t had time, and really I still don’t! I hope to try and find the time to squeeze some creating in though! I also would like to learn how to sew.. I’ve had a machine for a few years that barely gets used, and generally be more crafty and creative! Watch this space!

Multi-coloured iPhone crochet stripe case

I wanted to make an iPhone cosy for a while now, and needed something really simple to get started on. Inspired by this gorgeous blog, I decided to do a stripy case, as I LOVE stripes. Especially multicoloured ones! The pattern in the blog was for her HTC phone, so I adjusted it to fit my iPhone & here is how I did it…

Materials & hook size

I used Rico Creative Cotton yarn from here & a 4mm hook.

Stitches

The stitches used are chain stitch, SC (US Single Crochet) & SS (slipstitch)

20111009-151338.jpg

I chained 31 to fit around my iPhone. Depending on yarn/hook/tightness, you may need to adjust to fit. Leave at least 6″ tail for sewing/slip-stitch bottom of case at end.

Row 1. Insert hook into 2nd chain from hook, and SC into every stitch along the row. Turn.

Row 2. Ch1, SC into every stitch until the end. Fasten off leaving a small tail for sewing in sides of case at end.

**Row 3. Tie on new colour by knotting it with previous tail-end. Insert hook right underneath first stitch, draw yarn through, Ch1, SC into the first stitch of previous row. SC along rest of row. Turn.

Row 4. Ch1, SC into 2nd stitch from hook & continue to end. Fasten off as before, leaving enough yarn to SS the sides. **

repeat between ** ** until you reach desired size to fit iPhone.

Finishing off

With right sides together, lined up neatly, using the yarn tail, SS along bottom of case, securing at end with knot. See photo below. This is the RIGHT way, once it’s been turned inside out.

20111009-151526.jpg

Do the same for the sides, using a SS with the yarn tails. Once you are confident it’s all secure, turn case inside out so that the right side is now visible & check the seams. If happy, turn it inside out again & I knotted each pair of yarn tails per colour & snipped the ends to make it a little tidier. Turn back inside out to the right way, and case is complete!

This is the first time I’ve done a crochet project that required joining seams together, (I’ve been a blanket girl up till now!), so it’s not perfect, but I am pleased with it, I think when I do it again, I will be able to do the ends inside the case much neater.

Hope you found this tutorial helpful, let me know how you get on!

20111009-151250.jpg

Photography Prints – “Vintage Marbles”

I am thinking of doing a limited edition poster print run of  “Vintage Marbles”  – If anyone would like to place an order, please leave me a comment or tweet me at @polly_orange, or send me a message on my Facebook fan page!

The poster would make a fun and unusual addition to any room, particularly a playroom or a children’s bedroom!

#13/365 - vintage marbles

15″ x 10″ Poster prints inc. p&p – £15

18″ x 12″ Poster prints inc. p&p – £20.

Prints will be on superior quality 200 year fade resistant paper & will be sent unframed, 1st class in sturdy postal tubes.

Other sizes or products may be available upon request.

Please get in touch if you require any other information 🙂

Orders will take between 10-14 days.

ETA… ORDERS FOR THIS PRINT ARE NO LONGER AVAILABLE.

Click to view on Flickr.

*Please note: the “#13/365” in the bottom left-hand corner will NOT be on your prints.

“Vintage Blues” – custom order

I’ve not blogged for ages sorry! I’ve been meaning to write-up some of the processes behind recent custom orders & never got round to it, but I’ve done some custom bead bracelet orders in the last few months that I am very proud of, so thought I should document them here!

Firstly, back at the beginning of the summer, I was asked if I would do a bracelet for a fellow crafty lady – Shirley of Pussygalore Sockcats & Diddybears fame!  She sent me some photos of some new outfits/materials, described the type of colours she wanted, and I set to work sourcing the right beads.

Vintage lampwork beads 1950's

In my mind, I envisaged a sort of “eclectic cluster” of beads with a vintage feel, and was so chuffed when I managed to source some vintage 1950’s dark blue beads, along with some Wedgewood inspired vintage glass mottled beads dating back somewhere between the 1920’s-1950’s. (above).  These were to be integral to the design of the bracelet & also were to be incorporated into a delicate pair of earrings to complement.

During the process, I had some very sad news which set me back a little, but Shirley was very patient, supportive, and understanding, which helped spur me on to complete the order when I was doubting myself & my abilities. So, I have a lot to thank her for as this piece got me back on track!

It was an anxious wait whilst I waited for her approval of the finished set, but luckily she loved it! Even dedicating a whole thread on Folksy to it!!

So here is the finished piece… “Vintage Blues” bracelet & earrings…

"Vintage blues" charm bracelet
"Vintage blues" charm bracelet.
"Vintage blue" earrings

“Gorgeous eclectic cluster of various vintage and new glass beads, and silver-lined crystal seed beads.

Featuring, blue & white patterned vintage 20’s/30’s 9mm glass beads, in Wedgewood colours, 6mm round blue ab glass beads, 7mm vintage 50’s Czech glass violet blue lampwork beads, pale semi-opaque blue/white glass nugget beads, (possibly vintage), all interspersed with a mix of pressed glass beads, Czech glass, and white beads.

On a silver-plated charm bracelet with toggle fastening, measuring approximately 19cm in length,
The bracelet is gorgeous and dangly to wear, with a substantial weighty feel on the wrist. (Approx. 80g)”


Thank you Shirley for giving me the opportunity to make something for you! Hope you still love it 🙂


“Horses ‘n’ Hearts” bracelet

This was a custom order for an eight year old girl’s birthday. I hadn’t done children’s jewellery before (aside from some wooden surf bracelets for my boys!), so this was an exciting project.

The brief in keywords were something like, “punky, funky, pink & blacks, sort of goth-like, girly, dangly, with horse charms” – so I had quite a lot to work on! Firstly I had a look around the internet for horse charms, but nothing stood out, a lot of antique silver-plated type charms came up but nothing that I liked, or that I felt fitted the brief, so I looked to Twitter!

On Twitter, I had recently made acquaintance with Vicky from StarsNScars who makes unusual and quirky jewellery using various mediums, and in particular plastics. Approaching Vicky, I asked if she would be able to make me some custom charms, including a couple of horses! I told her the colours I wanted and left her to it!

When they arrived I was so chuffed! They were better than I could have imagined, and so different from other charms I had seen!

*Picture taken from StarsNScars facebook page*

I immediately set to work in designing the bracelet around the charms, and used assorted hot pink, polka dot, and shimmering dark buttons. Amongst the buttons & charms were some little clusters of plastic hot pink & black beads with silver-lined crystal seed beads. I used a sterling silver charm 6″ charm bracelet chain with toggle fastening.

I was so happy with how it came out, I wanted a grown-up version!! The little girl I was told loved it to bits, and you can see her on my facebook page in the “Fan Photos” section modelling it beautifully!

Here is the finished bracelet…“Horses ‘n’ Hearts”


“Cherry” bracelet

I haven’t been in a creative zone for a while for many reasons, plus it’s hard to get time to make jewellery when you have a 15 month old toddler (and two other children!) – and when the toddler doesn’t sleep, the motivation to spend the evenings making jewellery is even harder!

To ease myself back into creating something, I had a friend with a birthday coming up, and she needed a present! Unfortunately, her dear Mum had not long passed away, but after the funeral, I was honoured to be given a box of her buttons as a gift, many of which were vintage, which I love.

I felt that to make something for my friend using some of the buttons I was given would be a touching and fitting present, so I set about sorting through the stash to see what beautiful buttons I could choose! Firstly I found some larger semi-translucent greeny/turquoise buttons with shanks, and based my design around these. I interspersed these with a mix of pearly rectangular buttons, various silver coloured buttons, and some dark greys.

I was really pleased with how well the bracelet and the colours worked, particularly as I managed to just use her buttons and had no need to raid my own supplies, so knowing the complete bracelet was made entirely using her Mum’s (Cherry’s) buttons made it an even lovelier project to work on.  Note: since the photograph, I did add a couple more buttons near the clasp!

Although I was apprehensive when giving it to her, thankfully she loved it! It was a real honour to do something special that I knew would mean a lot to her.

So here is the “Cherry” bracelet

More photos can be found on my Flickr page.

Sam

A beautiful, vibrant wonderful girl who was taken from us far too young…

I had known Sam since she was a baby, and she was close to my nephews and family, and now she has gone, I don’t think anyone could ever quite fill that void – she was a real one-off.

The minute Sam walked in a room, it lit up. She had an amazing energy, a spirit that would lift the room. Fun, capricious and above all else, a really lovely young woman.

The last time I saw her was when I was helping to prepare for my eldest nephews surprise 21st Valentines’ birthday. They had been friends since they were babies. She was musical, talented & so creatively inspiring. We giggled as we made “kissing booths” and wondered where to put the the holes 😉 Ideas would pour out of her mind at a rate of knots, and it was hard to keep up!! Her chaotic and creative ways were inspiring, and her style was unique. She didn’t fit into any mould, but perhaps broke a few along the way!

Sam could sing, and was well known on local music scene, and was going to go far… on my nephews birthday, she wrote him a song and performed to us all, and brought tears to quite a few eyes. 🙂 I can still hear her singing it in my mind…

I can’t actually believe she has gone.

All of my family are deeply upset, so I can’t even begin to imagine what her poor family must be feeling…and I send them all my love at this time.

I hope that wherever you are Sam, you are happy again – you will always be in our memories.

Butterflies

As an aside from my usual jewellery blog posts, I thought here would be a nice place to document the progress of my latest mini adventure.. rearing some butterflies. A very lovely friend of mine wrote a blog post HERE all about butterflies, and how she rears them. Please do go check it out!

We are starting off with just four Painted Lady and three Peacock butterflies.

I collected them yesterday from my friend, and so far, we are besotted with these tiny little creatures! My two eldest sons are captivated by them, and we all just spent a lovely time, clearing out their containers and filling with new fresh nettles to munch on. This has to be done daily.

Here are a couple of photos of the Painted Lady’s… they are much bigger than the Peacocks at this stage.

and the tiny Peacock caterpillars…

This is the Peacock butterfly…

The Painted Lady butterfly…

*images from Cornwall Butterfly Conservation website*

Folksy Friday ~ Balloons

This week I have decided to do one of my other favourite “things” – balloons! I am fascinated by balloons, yet have a weird freaky fear of white balloons that stems from childhood… will probably not go into this now! 😉 But, for now will showcase a few balloon related finds on Folksy…

First up, a quirky shop that I stumbled across recently, love this print, despite one of my other fears – clowns!

“Balloooons Print” from David Cloud Makes Noise

“Hand-tied balloon bouquet” by Balloon Baboon

I featured this seller in my “Butterflies” post last week, I love her photography…

“Almost Free” by Cassia Beck

I love resin jewellery, and this is quirky and fun…

“Running friends and puppy” by A Resin Revival

What a lovely fun design!

“Super Cat Cushion” by DinkyDaisy

Unusual item of jewellery -bright & bold…

“Balloon Print Fabric Necklace” by CottonCandyCorsage

and finally to round off my Folksy Friday…

“The Red Balloon – Wooden Triptych” by mrs eliot books

Folksy Friday ~ Butterflies

This is my first Folksy Friday blog post, and I thought my first theme would be “Butterflies”.

Summer is nearly upon us, and soon we will have beautiful butterflies fluttering around the flowers in our gardens! I have been a butterfly fan as long as I remember, and to be honest am a sucker for anything butterfly related, so here goes!

First up is “Butterfly Flower Brooch” from Lupin Handmade.

I love this next shop, and such a lovely lady too! I have some of her postcards which I adore, and I am coveting pretty much most of the things she sells! 😉

“Love birds with butterfly – original small art canvas” by Mochalulu

Next is “Oh to be a butterfly” by Cassia Beck Photography

I love the next one as it features one of my other favourite things…buttons! Brighten up a dull wall with these lovely 3d wall decorations…

“Vintage patterned butterfly & flower 3d wall art” by 100 Percent Delicate

Something a little unusual and perhaps darker… I love this!

“Butterfly Meadows original canvas by Verity Nicholson” by Tiphereth Art

This is adorable! What a lovely shop!

“4 really very lovely postcards” by Lil Sonny Sky

and finally… can not have a butterfly theme without featuring my friend’s lovely shop! All my twitter followers will probably recognise this photo! 😉

“Flutterby Love necklace” by Crafty Little Mia

I hope you all enjoyed my first ever Folksy Friday post! Have a fabulous bank holiday weekend! 🙂